
RunPod
Connect a RunPod GPU pod to OpenResearch as a self-managed instance. This lets OpenResearch SSH into your pod to run experiments.
1. Add OpenResearch's SSH key
Before OpenResearch can connect, your pod needs to trust OpenResearch's public key. There are two ways to do this depending on whether you've already created your pod.
Before creating the pod
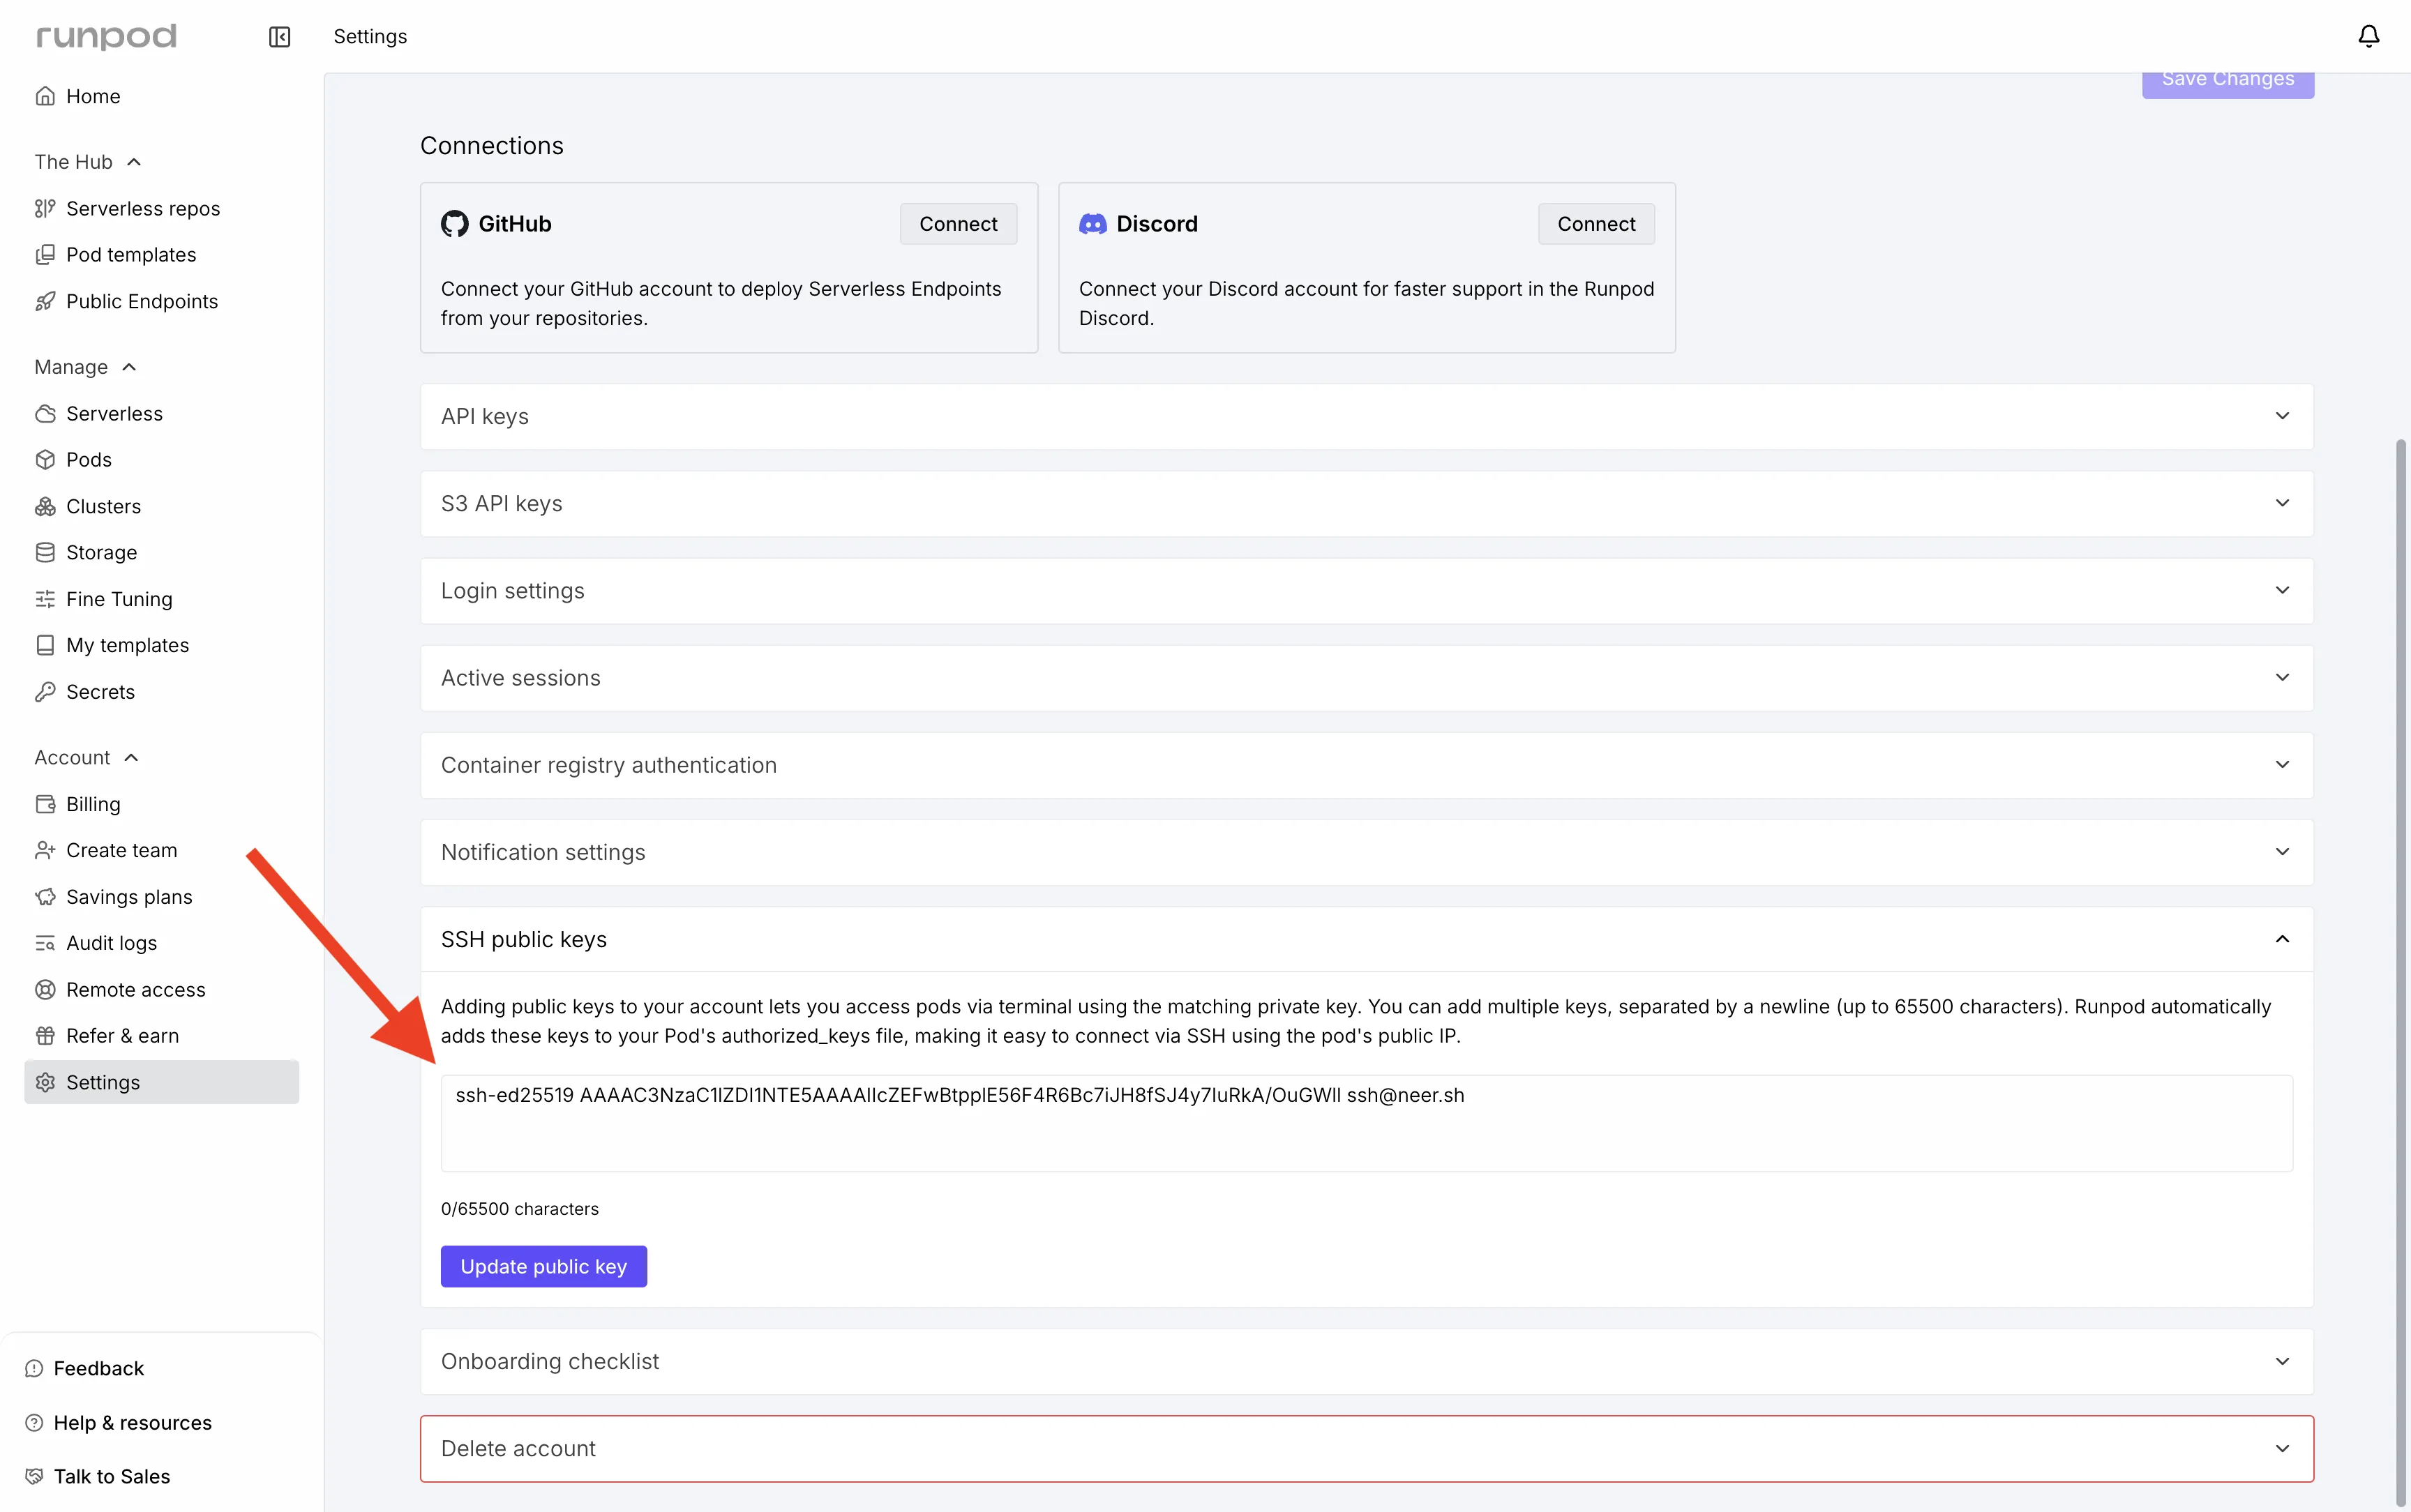
Go to Settings > SSH public keys in the RunPod dashboard and paste OpenResearch's public key. RunPod will automatically add it to every new pod you create.
ssh-ed25519 AAAAC3NzaC1lZDI1NTE5AAAAIIcZEFwBtpplE56F4R6Bc7iJH8fSJ4y7IuRkA/OuGWll [email protected]
On an existing pod
SSH into your pod and run:
mkdir -p ~/.ssh && echo "ssh-ed25519 AAAAC3NzaC1lZDI1NTE5AAAAIIcZEFwBtpplE56F4R6Bc7iJH8fSJ4y7IuRkA/OuGWll [email protected]" >> ~/.ssh/authorized_keys
See SSH Keys for more details.
2. Get the SSH connection info
In the RunPod dashboard, click on your pod and go to the Connect tab. You need the SSH over exposed TCP connection (the second one, not the first).
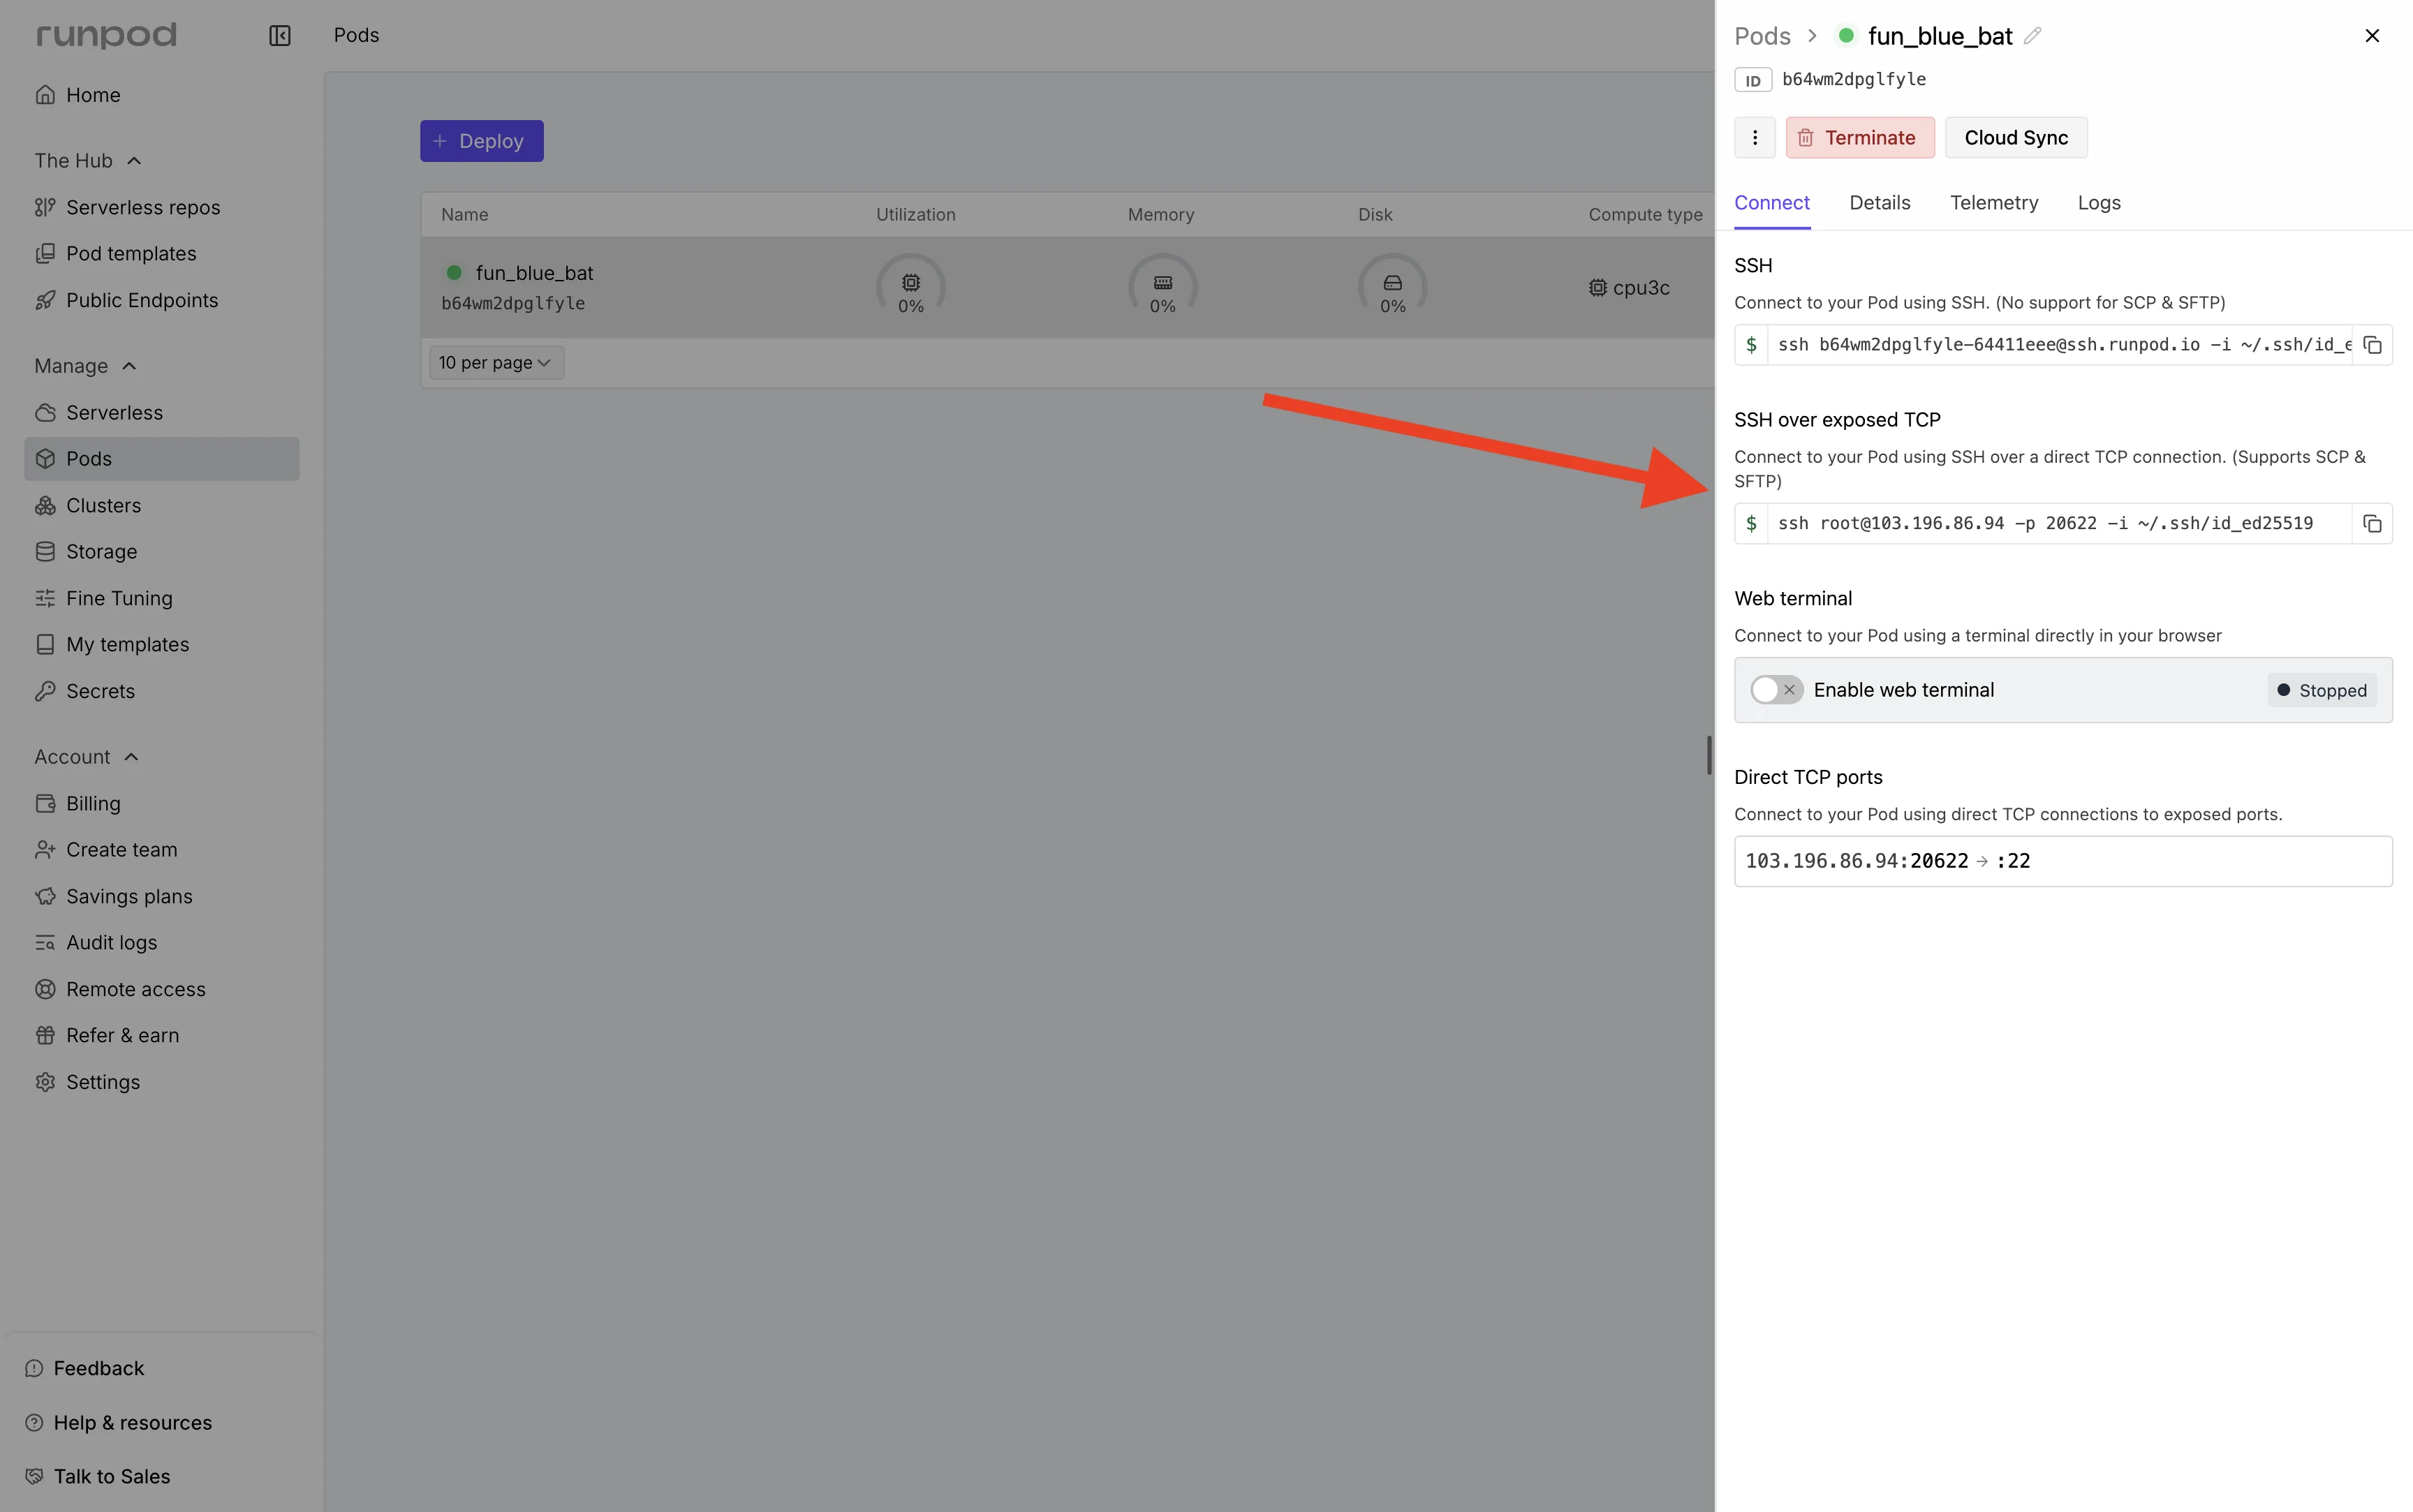
Important: The first SSH link (via ssh.runpod.io) will not work with OpenResearch. You must use the SSH over exposed TCP connection.
3. Add the instance in OpenResearch
Go to your project's Compute tab, click New Instance, and select Self-managed. Paste the full SSH command to autofill the configuration, or fill in the fields manually:
| Field | Value |
|---|---|
| Hostname | The IP address (e.g. 103.196.86.94) |
| Port | The exposed port (e.g. 20622) |
| Username | root |
Once added, OpenResearch will connect to the pod and show it as online. You can then use it to run experiments.